
Do you want to know how to find duplicate images on hard drives? Many people use external hard drives for backups, especially when using Time Machine. You can also use them to move files between computers. Using an external hard drive increases the likelihood that duplicate files may build up over time.
Mac devices are already low on storage space and when you take a backup of your memories from a smartphone, you run out of storage space. Locate any duplicate photo or media file on your drive and have them removed so you can make better use of the space available. This post will review simple methods to delete duplicate photos from your external hard drive.
Avoid Creating Duplicate Photos
You can avoid creating duplicate photos with these tips:
- Stop Syncing the same cloud storage account on multiple devices.
- Avoid frequent backups and restores as it brings them all up.
- Save the original picture instead of saving the changes to a new image.
- Avoid using the Burst Shot or Continuous Shot on camera rolls.
- Do not interrupt while moving or copying photo albums.
- Stop downloading the same image repeatedly.
Method 1: Utilise Finder on Mac
How can a Mac user locate and delete duplicate photos using an external hard drive? Using a Mac duplicate file finder is the way to go. Manual labor is another option. It’s easier said than done. But if your external hard drive has a lot of duplicate files, it might not be worth your time and effort. Anyhow, we’ll show you how.
Step 1: Securely connect your external hard drive to your Mac. Access the Finder. Choose the external drive from the Devices sidebar.
Step 2: Go ahead and press Command-F. It will bring up a search bar.
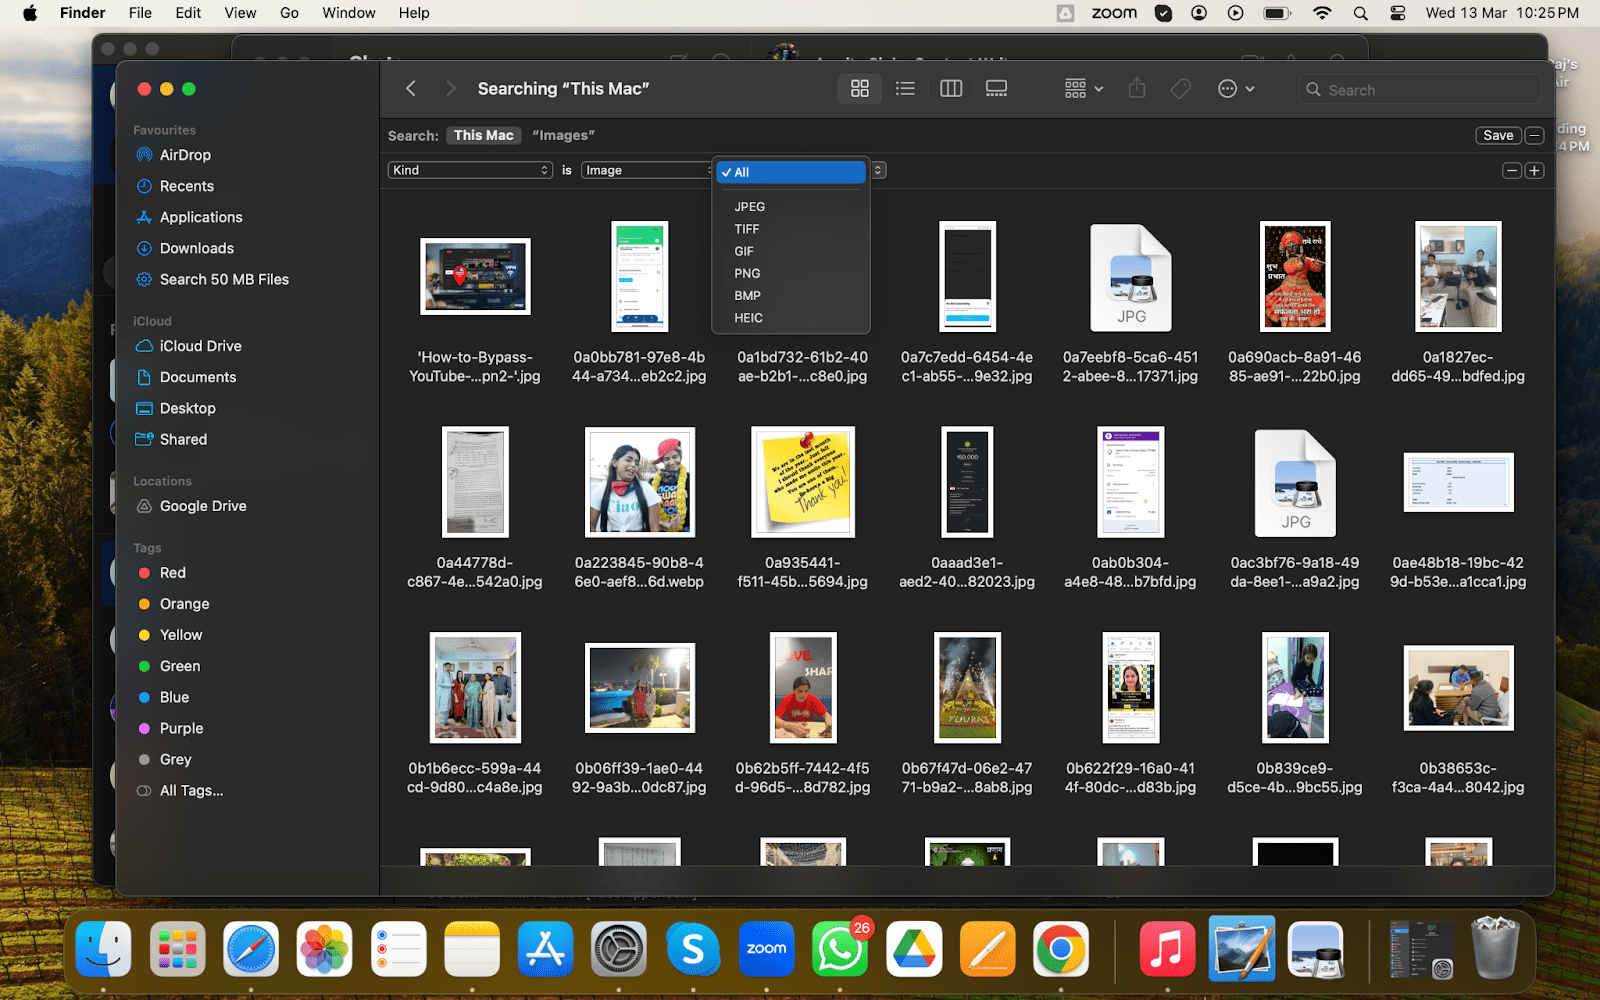
Step 3: From the available search parameters, choose Kind. Choose the file type that best suits your needs in the second drop-down menu. Additionally, select a particular file type if required.
Step 4: Preview, compare, and locate duplicate files; sort listed files by name or other criteria. Toss the ones you don’t want to keep in the Trash.
Method 2: Execute Terminal Commands
Another useful feature of Terminal is its ability to detect duplicate files on both the internal and external hard drives of a Mac. Just keep in mind that it can only detect duplicates. Manual deletion of the files is still required. Every Mac comes with a Terminal.
Step 1: Locate Utility in the Finder’s Applications folder. Get Terminal and open it.
Step 2: By entering cd ~/Downloads and pressing the return key, you can locate the duplicate files in a folder, such as Downloads, using the cd command.
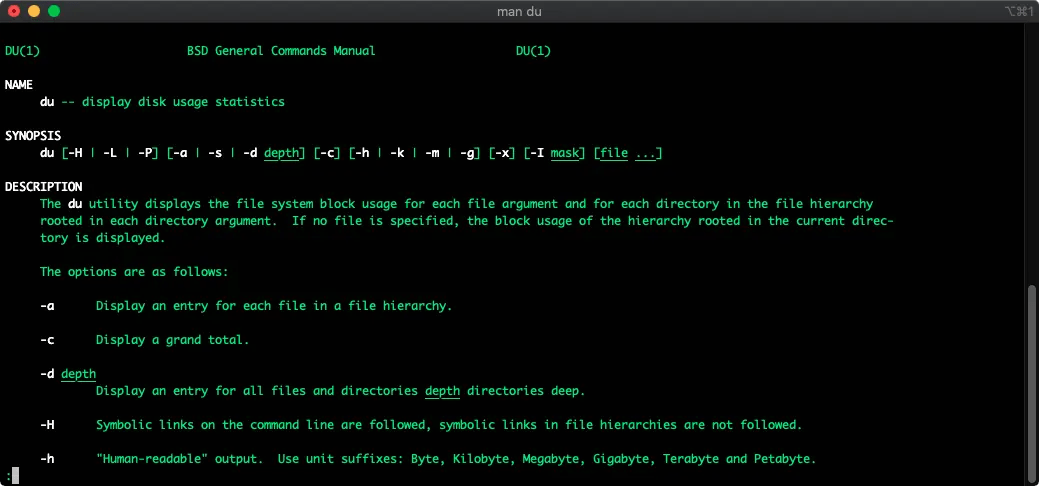
Step 3: Enter the command: find. -size 20 \! -type d -exec cksum {} \; | sort | tee /tmp/f.tmp | cut -f 1,2 -d ‘ ‘ | uniq -d | grep -hif – /tmp/f.tmp > duplicates.txt. Click the return key.
Step 4: To view a list of identical files, open the duplicates.txt file. You can now remove hard drive duplicates by hand.
Method 3: Launch File Explorer on Windows
File Explorer is a built-in app on your Windows computer. Finding specific files has never been easier than with this tool. If you have an external hard drive, you can learn how to find duplicate images on hard drives and remove them using File Explorer here:
Step 1: Get your external drive hooked up to your computer.
Step 2: To launch File Explorer, press “Win” + “E” File. Go to the external hard drive on your computer.
Step 3: Head over to View > Details.
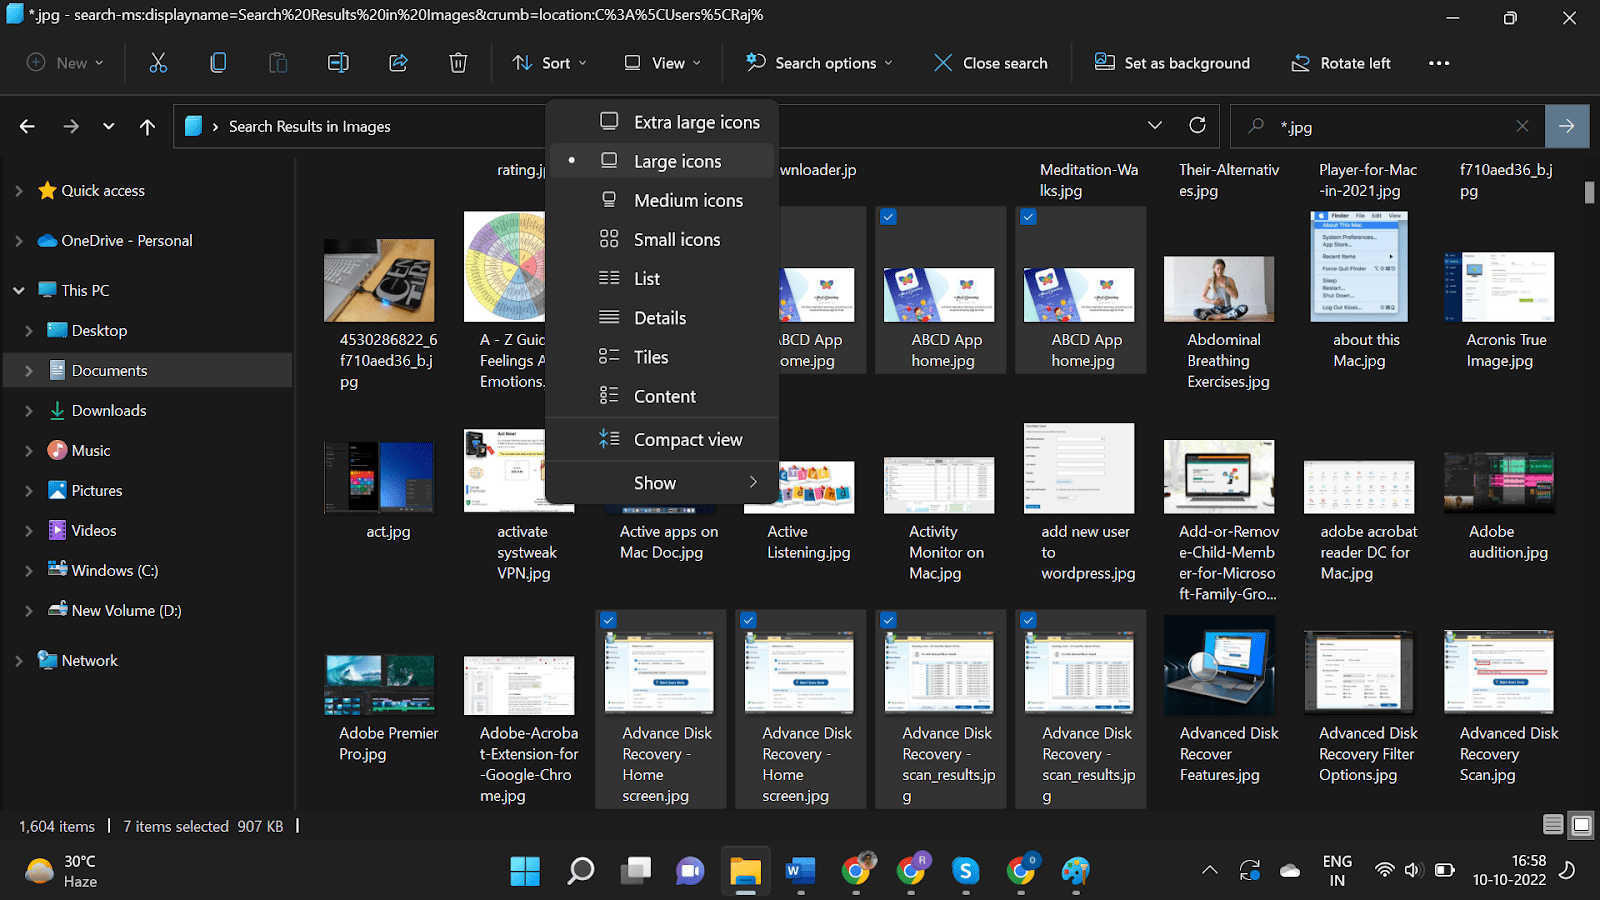
Step 4: To sort by size, go to Sort > Group by.
Step 5: Fill out the search bar on the top right with the extension, like.jpeg.
Step 6: Find the duplicates by going through your files.
Step 7: Remove hard drive duplicates from one another.
Method 4: By Using Duplicate Photos Fixer Pro
Here are the steps to use Duplicate Fixer Pro:
Step 1: Get Duplicate Photos Fixer Pro Started.
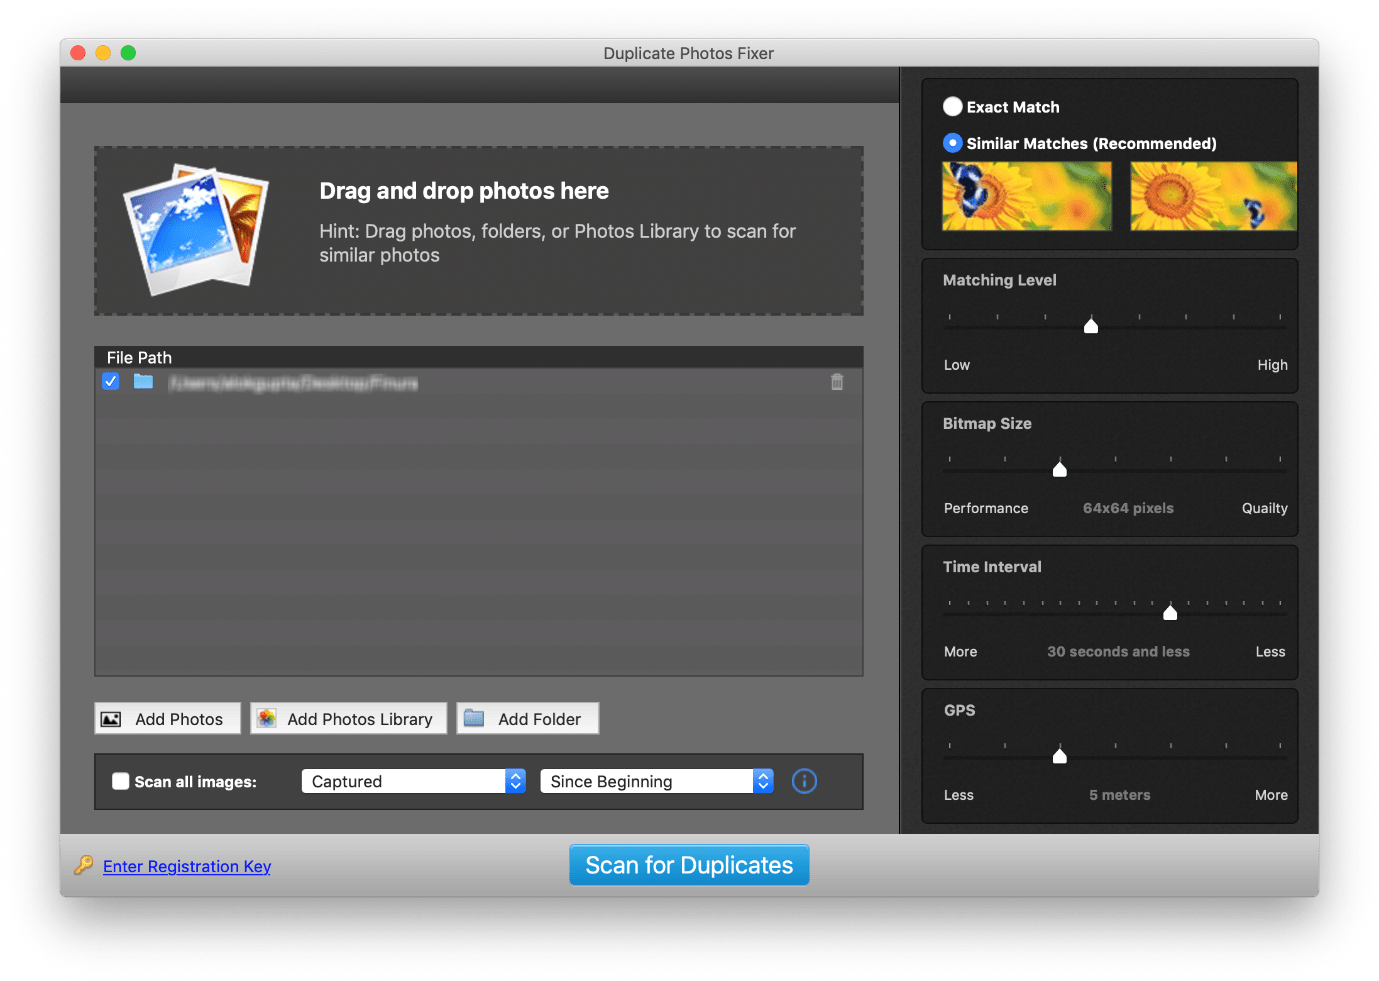
Step 2: Choose Add Photos/Add Folder or drag and drop images to scan.
Step 3: Pick between “Similar” and “Exact” comparisons for each match.
Step 4: To find similar images, adjust the Matching Level.
Step 5: Afterwards, select Scan for Duplicates from the menu.
Step 6: Just be patient and let it finish. The application will load the photos, compare them, and display the duplicates in a table so the user can delete them. The process takes time, depending on the number of photos.
Step 7: A window displaying the scan results will appear after this. Use the Selection Assistant or the Auto Mark feature to choose the detected duplicates. It will ask you to choose at least one duplicate to clean before you can click Delete Marked. You can even access the Show Quick Guide option if you need assistance.
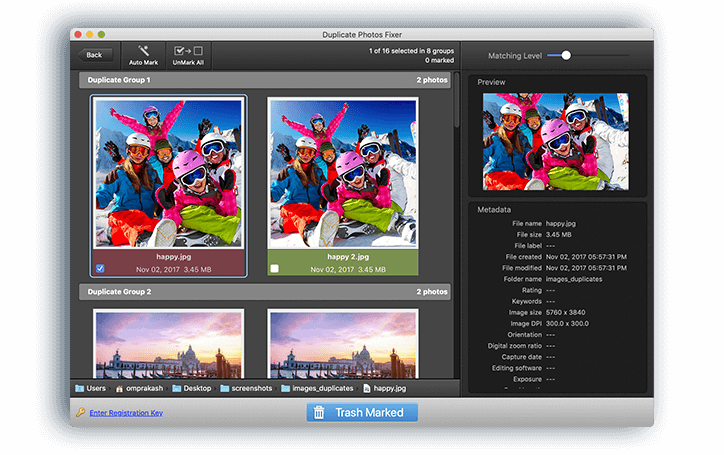
Step 8: Lastly, to remove HDD photos, click the Delete Marked Button. This is a simple method for cleaning Windows of duplicate images.
Duplicate Photos Fixer Pro
Duplicate Photos Fixer Pro is an excellent choice if you want to locate and remove duplicate photos from your computer, cloud storage, or any other device. It employs a smart algorithm to compare photos and display exact copies. The program doesn’t rely on filenames to locate duplicates; instead, it uses content comparisons and other criteria to identify authentic photoduplication. Finding and removing duplicate photos has always been challenging and faster. It works with Mac, iOS, Windows, and Android.
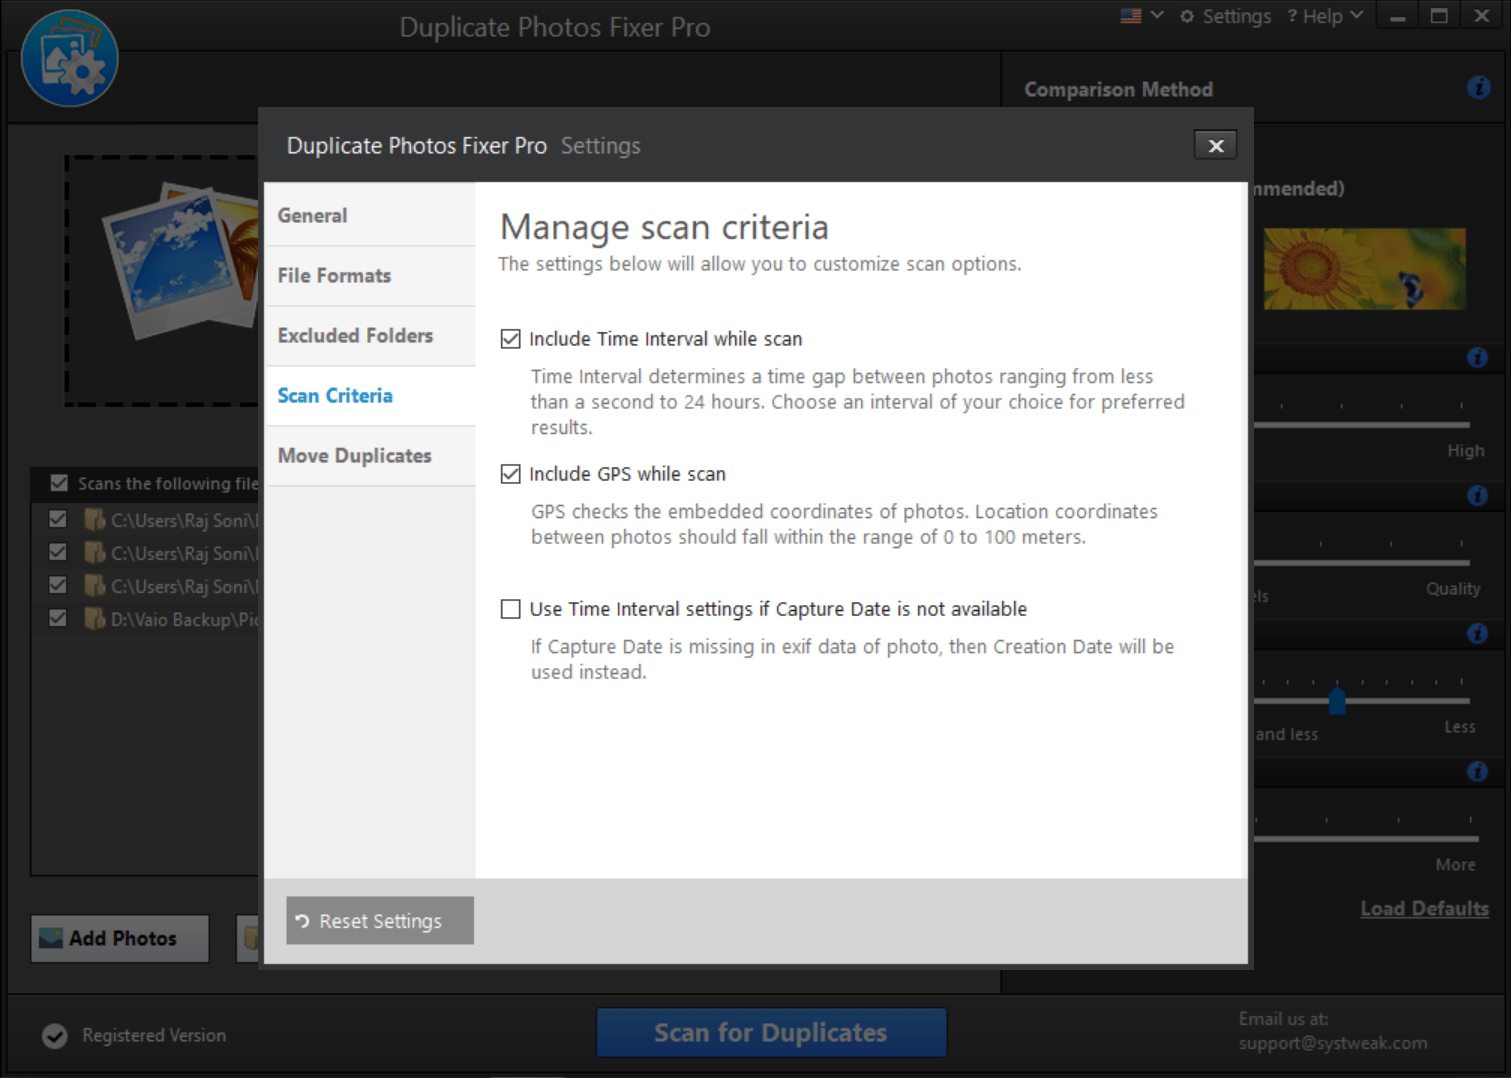
Features:
- Copy and scan related images
- Allows for a variety of picture formats
- To add images and folders, drag and drop
- Allows for the use of external devices
Conclusion
The methods above are standard for locating identical photos on an external hard drive in a Mac or Windows computer. Duplicate photos and media files can consume valuable storage space on both your internal and external hard drives. You can make more room on your external hard drive by removing unnecessary duplicate files using a program like Duplicate Photos Fixer Pro. You’ve found this tutorial and can easily find and remove HDD photos.

