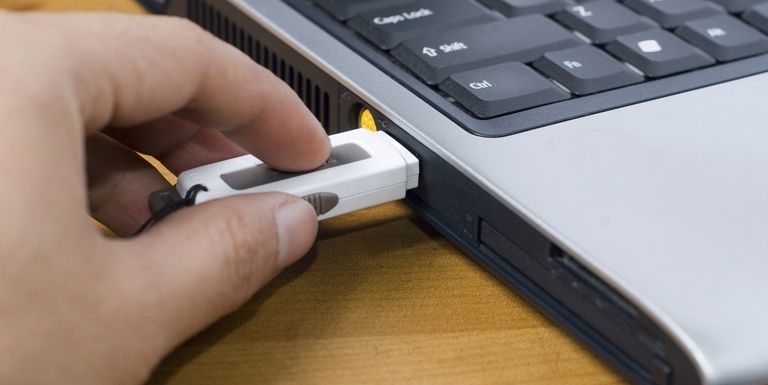
So, you transfer lot of your data using USB flash drives very often?
Well, this is the general practice people follow at mass level. Unlike any other user in the globe when you use USB drives to transfer your data, it also brings a hidden threat of malware that could be contained by the drive.
Here, you may be completely unaware of this threat on your USB drive from where you are transferring your data. Thus, the best practice is to avoid this practice to keep your valuable data safe on your system. Well, even if you stop using USB or other external drives on your system, chances are high that someone else could breach your system security and transfer malicious content on your PC using USB drive.
In such a situation the best thing you could do is to disable USB port in Windows 10. You can enable it whenever you want in few quick steps when needed. In this article, we have discussed ways to enable or disable USB port on Windows 10 following few simple steps.
Enable or disable USB port using the Windows Registry
To enable or disable USB port on Windows 10 using registry, follow these steps:
- Type regedit in the search box on the taskbar and select Registry Editor from given options.
- Press Yes when prompted on next window.
- Here, Registry Editor will open on next window.
- Sift through the folders in left pane to find and open “HKEY_LOCAL_MACHINE” option.
- Under this folder other sub-folders will be visible. Here, click on System > CurrentControlSet.
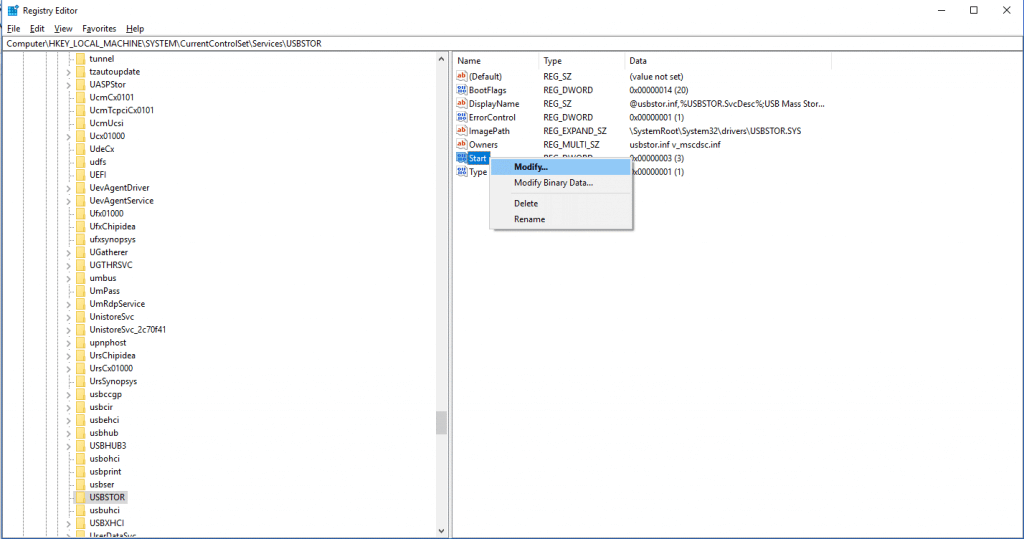
- Next is to select Services folder > USBTOR.
- Now that you have selected USBTOR option, click on the Start option.
Here, a new window will appear. Now you need to change value data from default “3” to “4” and press OK. It will help you disable USB port on Windows 10.
Note: To re-enable the USB storage, simply change the value data to its default value “3” and press OK.

Enable or disable USB port using the Device Manager
Next quick solution to enable or disable USB port on Windows 10 is to tweak settings under Device Manager. To do this, follow below mentioned steps.
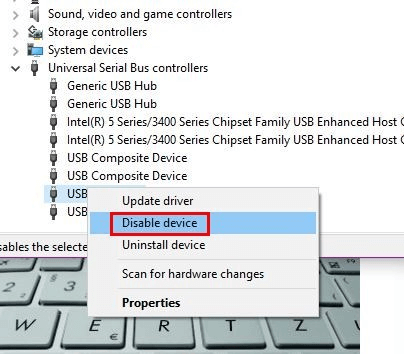
- Right-click on Start menu and select Device Manager.
- Once you are on Device Manager window, expand Universal Serial Bus Controller option which is the last option.
- Here, select uninstall option for the USB drive. Now if someone tries to insert USB drive on your Windows system, he won’t be able to find the drivers.

Enable or disable USB port using the Group Policy Editor
You can also enable or disable USB port on Windows 10 using Group Policy Editor. To do this, follow these steps:
- Press Windows + R keys to open Run box.
- Here, type gpedit.msc and press Enter.
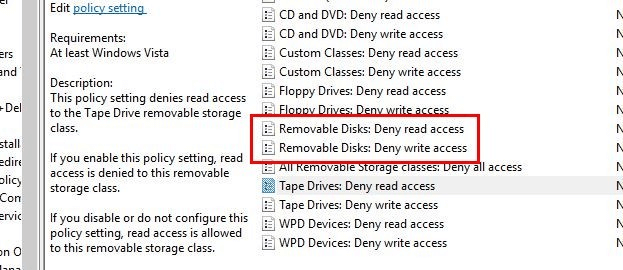
- Now you will be on new window. Here, select Computer Configuration > Administrative Templates > System > Removable Storage Access.
- Once you tap Removable Storage Access option, you will find new options appear in right panel.
- Here, you will see 3 different options including “Removable Disks: Deny execute access”, “Removable Disks: Deny read access”, and “Removable Disks: Deny write access”.
Here, you need to click on each option and configure it for best settings. Once you click on any of these options a new window will appear. To the left panel, you will find options including Not Configured, Enabled, and Disabled. Use these options to enable or disable the USB port in Windows 10.

Enable or disable USB port using the USB Blocker Apps
Next simple yet most effective method to enable or disable USB port on Windows 10 is to use third-party USB port blocker apps. These smart tools offer various useful features to keep your system safe by blocking access to USB port. Using these smart USB port security features, you can keep unwanted users accessing your system to share data. Following these smart tools, you can easily manage to avoid malware threat on your PC.
Conclusion
So, these were few simple yet most effective ways to block USB port on Windows 10. Do try these steps to keep your system safe from unnecessary troubles. And don’t forget to share your experience trying these smart steps.

